Solving The "Undefined Date" Error For Blogger Blogs

Undefined Date For BLogger BlogUndefined Date For BLogger Blog

In the above pics you can see the "Undefined" error instead of the Blog Post date. Many blogger blogs get this error. This is mainly due to the default date settings for the blogger blogs. Correcting this error is very simple.


Read More »

0 comments:

Add "Back To Top" And "Go Down" Links To Blogger Blog

Back To Top n Go Down


If you check my blog, on the Right Side you will see two arrows pointing in the opposite direction. Try clicking on both of them. The one pointing up will take you to the Top of the Page, while the one pointing down will take you to the Bottom of the Page. You must have seen the Back To Top of Page link in many blogs, but I felt that there is a need of a Go Down button. Yup, that's what I am calling it, a "Go Down" link because that's the work it does. You can also call them Scroll To Top and Scroll To Bottom links.


Now adding this Widget/Gadget/Plugin to your Blogger Blog is very easy and requires simple HTML code. Adding the Back To Top Page Icon is very easy, but for the Go Down Icon you will have to add a single line of HTML code in your blog template. But its very easy to do.

Step 1:
Login to your Blogger account. Visit the Layout of the blog for which you want to add these buttons. Now click on Add A Gadget option and select the HTML/Javascript option and paste the following code in it


<a style="display:scroll;position:fixed;bottom:260px;right:5px;" href="#" rel="nofollow" title="Back to Top"><img style="border:0;" src="http://i31.tinypic.com/2vtqqt3.png"/></a>

<br/>

<a style="display:scroll;position:fixed;bottom:225px;right:5px;" href="#GoDown"><img style="border:0;" src="http://i32.tinypic.com/16lle91.png"/></a>


Click on Save and refresh your blog.

Step 2:
Now you will be able to see both the icons on your blog. However you have one more step remaining. Now click on Edit HTML option and select the Expand Widget Templates option.

Now search </body> in the blog template and paste the following code just above it .

<a name='GoDown'/>

Now click on Save Template and refresh your blog. The Back To Top and the Go Down will be working properly.

Now there will be some people who would like to customize this Widget for their blog. So for them I have highlighted some of the code in Red colour. Here are the following modifications that you can make.

1. Widget appears on Left Side
2. Increase/Decrease the distance of the Icons from bottom
3. Add different icons

1. If you want the widget to appear on the Left hand side instead of Right side, then replace right:5px; with left:5px; at both the places in the code.

2. If you want to Increase/Decrease the distance between the icons or from the bottom, then change the value of bottom:260px; and bottom:225px;

3. If you want different icons then just replace the url in red with the url of your icon. Important: It would be better if you copy the image and upload it yourself. Both the image url's are highlighted in Red colour. Just replace it with your own image url


0 comments:

Choosing A Domain Name For Your Blogspot Account

This is a Guest Post written by Eva Vesper at WHS, a web hosting information site
that provides reviews and articles about hosting and finding domains.

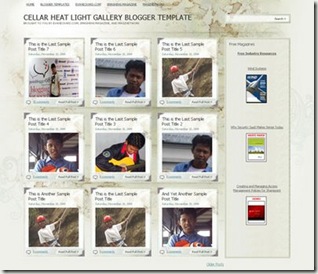
If you are planning on a name for your blogspot site, treat it like
finding a domain name for a self-hosted website. The advantage of having a
blogger account is that Google hosts everything for you. The disadvantage:
you don't have control of everything on your site. But who cares, you want
to simply blog and not worry about PHP, server side things, etc.

Here are five simple tips for picking a good blogspot name. As you have
less than three seconds to hold a visitor's attention, a good domain is
key. It's all about first impressions, so make your domain name a good
one.


1. Be Relevant : Do not choose a nickname, email address, or your pet's
name. Go with a name that reflects the theme of your blog. A few good
examples: lifeinAmerica.blogspot.com, adogslife.blogspot.com.

2. KISS : Keep it simple stupid - Yes, it is that hard. Long or
convoluted names are not good. Your URL address is already long enough
with the blogspot.com added on. If your subdomain is more than three
words, consider shortening it.

3. Do Not Sound Spammy : The worst thing possible is to pick a name that
appears like spam. Blogger already has spamming issues (unlike WordPress)
because of the ability to advertise. It's a fail if you have a site called
thebestmedicaldevicesonthenet.blogspot.com. Can you read that?

4. Do Not Use Misspellings Or Abbreviations : The most keyword friendly
blogspot subdomains are long gone. Do not let this be a chance to use
different spellings or abbreviating words. It will make your name look
even more confusing.

5. Get Rid Of The "-" : That dash may make it easier to read the name but
it will not make it easier to tell your friends. Blog at
i-love-flowers.blogspot.com? Hoping your friends would pass that on by
word of mouth will be difficult. Avoid the hashes; it follows rule #2.

As always, Blogspot is a great place for people to have personal blogs.
Corporate or brand blogs are unacceptable on blogspot for three reasons:

1. Blogspot.com subdomains are not trusted domains
2. It looks cheap
3. It's not professional. Keep that in mind too when you are creating a new blog
on Blogspot.

Remember, get a new URL that is easy and friendly, write great content,
promote it, and you will have a popular site.


0 comments:

Add A Recent Comments Widget To Blogger Blog

Blogger Widgets


In the last post Simplest Way To Add A Recent Posts Widget To Blogger Blog I explained a very easy method to add a Recent Posts Widget to Blogger blog. Using the same method, we can also create a Recent Comment Widget for blogspot users in a simple manner. Just follow the simple steps and add a Recent Comments widget to your blog.


Step 1:
Click on Layout option of the blog for which you want to add the widget.


Blogger Basics


Step 2:
Now click on Add a Gadget option.

Blogger Widgets


Step 3:
You will see a list of Gadgets. Find Feed among them and click on it.


Blogger Widgets


Step 4:
Now you will have to add your Blog Comments Feed url and click on Continue. Once you do that, you will be taken to a page where you can choose how you want to display the Recent Posts Widget. You can also choose how many comments you want to display in the widget.

If you don't know the comments feed URL of your blog, then replace the blog address with your blog address in the URL given below.
http://www.cooltricksntips.com/feeds/comments/default

Just replace www.cooltricksntips.com with www.yourblog.com or www.yourblog.blogspot.com


Recent Comments Widget


Click on Save and refresh your blog, you will see the Recent Comments Widget on your blog


0 comments:

Simplest Way To Add A Recent Posts Widget To Blogger Blog

Blogger Widgets


If you want to add a Recent Posts widget/gadget/plugin to your Blogger blog, you don't need to waste time to search other sites which will add a recent posts widget for your blog. Blogger has already provided a simple way to add a Recent Posts Widget

Just follow these simple steps


Step 1:
Click on the Layout of the blog for which you want to add the widget.


Blogger Basics


Step 2:
Now click on the Add a Gadget option.

Blogger Widgets


Step 3:
Now you will see a list of Gadgets. Find Feed among them and click on it.


Blogger Widgets


Step 4:
Now you will have to add your Blog RSS Feed url and click on Continue. Once you do that, you will be taken to a page where you can choose how you want to display the Recent Posts Widget. You can also choose how many posts you want to display in the widget.


Recent Posts Widget


Now click on Save and check your blog. The widget will appear on your blog.


0 comments:

25 Stunning Blogger Templates

Blogger Templates

Here is a collection of some of the best Blogger Templates that you will find online. Go through these wonderful templates and dont forget to give your comments.


Showcase:
Template by Dante Araujo
Features:3 Columns, Elegant, Fixed width, Photolog, Right sidebar, Auto post thumbnails

Showcase


Demo | Download


Infinity:
Template by BloggerFAQ's
Features: 3 fixed columns design,Thumbnail covers style,Flickr, Twitter and delicious integration

Infinity


Demo | Download


Daily Inspired:
Template by Woork
Features: Professional template, Integrated social bookmarking options,menubar

Daily Inspired


Preview | Download


Tree House:
Template by Falcon Hive
Features: Nature and artistic design, Twitter follow button, Twitter update section, 125×125 Ads section

Tree House


Demo | Download


Wordpress Fun:
Template by GosuBlogger
Features: 2 Columns, Adapted from Wordpress, Elegant, Fixed width, Left sidebar

Wordpress Fun


Demo | Download


Elegant Grunge:
Template by Falcon Hive
Features: 2 Columns, Adapted from Wordpress, Fixed width, Right sidebar

Elegant Grunge


Demo | Download


Dreamy:
Template by Dante Araujo
Features: 2 Columns, Fixed width, Magazine, Photolog, Right sidebar, Rounded corners

Dreamy


Demo | Download


Papeles y Color:
Template by Amuki
Features: 3 Columns, Fixed width, Right sidebar, Rounded corners

Papeles y Color


Demo | Download


Outdoorsy:
Template by Falcon Hive
Features: 2 Columns, Adapted from Wordpress, Fixed width, Right sidebar

Outdoorsy


Demo | Download


Cellar Heat:
Template by MagzNetwork
Features: Auto post summary,Menubar, Searchbox,Auto post image thumbnails

Cellar Heat


Demo | Download


Water Color:
Template by Falcon Hive
Features: 2 Columns, Adapted from Wordpress, Fixed width, Right sidebar

Water Color


Demo | Download


Zinmag Futura:
Template by Cahaya Biru
Features: Magazine style,inline posting,Auto post summary,Glide Content,Slider,Featured Post,Nice Chocolate Twitter Header,Post Focus included

Zinmag Futura


Demo | Download


Notepad Chaos:
Template by GosuBlogger
Features: 2 Columns, Adapted from Wordpress, Fixed width, Right sidebar

Notepad Chaos


Demo | Download


Discipe:
Template by Deluxe Templates
Features: 3 Columns, Adapted from Wordpress, Fixed width, Left sidebar, Right sidebar

Discipe


Demo | Download


Creative Art:
Template by GosuBlogger
Features: 2 Columns, Adapted from Wordpress, Fixed width, Left sidebar

Creative Art


Demo | Download


Black Power:
Template by Falcon Hive
Features: 2 Columns, Adapted from Wordpress, Fixed width, Right sidebar

Black Power


Demo | Download


Imprezz:
Template by Falcon Hive
Features: 3 Columns, Adapted from Wordpress, Fixed width, Magazine, Right sidebar

Imprezz


Demo | Download


BCute:
Template by Deluxe Templates
Features: 2 Columns, Adapted from Wordpress, Fixed width, Right sidebar

BCute


Demo | Download


Vector Flower:
Template by Deluxe Templates
Features: 2 Columns, Adapted from Wordpress, Fixed width, Right sidebar

Vector Flower


Demo | Download


New Arthemia:
Template by BloggerStyles
Features: 3 Columns,Fixed Width,Right Sidebar

New Arthemia


Demo | Download


Notebook:
Template by Ray Creations
Features: 2 Columns, Fixed width, Right sidebar

Notebook


Demo | Download


Blue Diamond:
Template by Falcon Hive
Features: 2 Columns, Adapted from Wordpress, Fixed width, Right sidebar

Blue Diamond


Demo | Download


Craftwork:
Template by BloggerFAQs
Features: 2 Columns, Adapted from Wordpress, Fixed width, Right sidebar

Craftwork


Demo | Download


Scarlett:
Template by Cahaya Biru
Features: Multi-level dropdown menu,custom elements ,125 x 125 banner ads,Adsense enabled,Featured Video ,Flash tag cloud, Popular Posts,Animated random post widget,Auto post summary,Left Image Thumbnail

Scarlett


Demo | Download


Abrasive:
Template by Deluxe Templates
Features: 2 Columns, Fixed width, Right sidebar

Abrasive


Demo | Download


0 comments:

"Follow Me On Twitter" Widget For Blogger Blog

Follow Me On TwitterYou must have seen the Follow Me on Twitter link which remains on its place even if you scroll the page. Its a great way to get many followers on Twitter as your blog readers are likely to follow you on Twitter if they like your posts. So you get many new followers on Twitter and you don't even have to try hard for it. Doesn't it sound interesting??

I have created a Blogger Widget/Gadget/Plugin or whatever you like to call it which will add a Follow Me on Twitter link on your blog. Check the pic below or check the Demo


Read More »

0 comments:

Open Links In New Window For Your Blog

When you visit some Blog or Website, you must have noticed that when you click on a link, it opens in a new window. This is a great idea used by many people as it keeps the users on your page and the users can also check the link that they want to see.

Sometimes the users click on a link thinking that they will return to your page after reading the content. However the links maybe so useful to them that they might not return back to your blog. This is not a good situation for you as you just lost a visitor. I am not saying that we should stop sharing links. Sharing useful links is a good thing to do. However if we make sure that these links open in a new window it will be great for us and the reader as well.


Opening a link in a new window is very easy thing to do. Whenever you add a link to your blog, it looks like the one shown below

<a href="Add Link URL">Some Text</a>

Now if you want to open the same link in a new window, you add some extra code in the above code.

<a href="Add Link URL" target="_blank">Some Text</a>

Just check this example. For the first link I have used the earlier code and for the second link I have used the new code. Click on both of them and see what happens.

Cool Tricks N Tips

Cool Tricks N Tips


Its a very simple thing which can increase the average page views for your blog. However, there are few people who feel that it is time consuming to add the code in every link. So for these people we can add a small piece of code in the Blog Template which will make every link in your blog to open in a new page. As a result we don't need to add the extra code to every link.

To implement it, go to the Blog Layout and click on Edit HTML. Now find <head> in the blog template. Search it by pressing Ctrl+F on the keyboard. After you find it paste the following code below <head>

<base target='_blank'/>


That's it, now click on Save Template and refresh your blog. The links will open in a new window. You can choose any one of the technique according to your liking.


0 comments:

Twitter Ad On Television

I was watching Animax and I saw this ad in which Animax is asking its viewers to join them on Twitter.

There is another ad which encourages the viewers to take a pledge titled “I Pledge To Be A Part Of TV History” at http://ipledgeanimax.com asking viewers to spread news about their TV shows on Twitter, Facebook and other sites.

animax1


This is the first time I have seen a TV Channel advertising about Twitter


0 comments: